
Easy 4th of July Sensory Bottle for Toddlers
This easy 4th of July sensory bottle is one of the fun sensory activities for independence day that your kids will love to do! Use in your home or as a 4th of July theme preschool in school too.
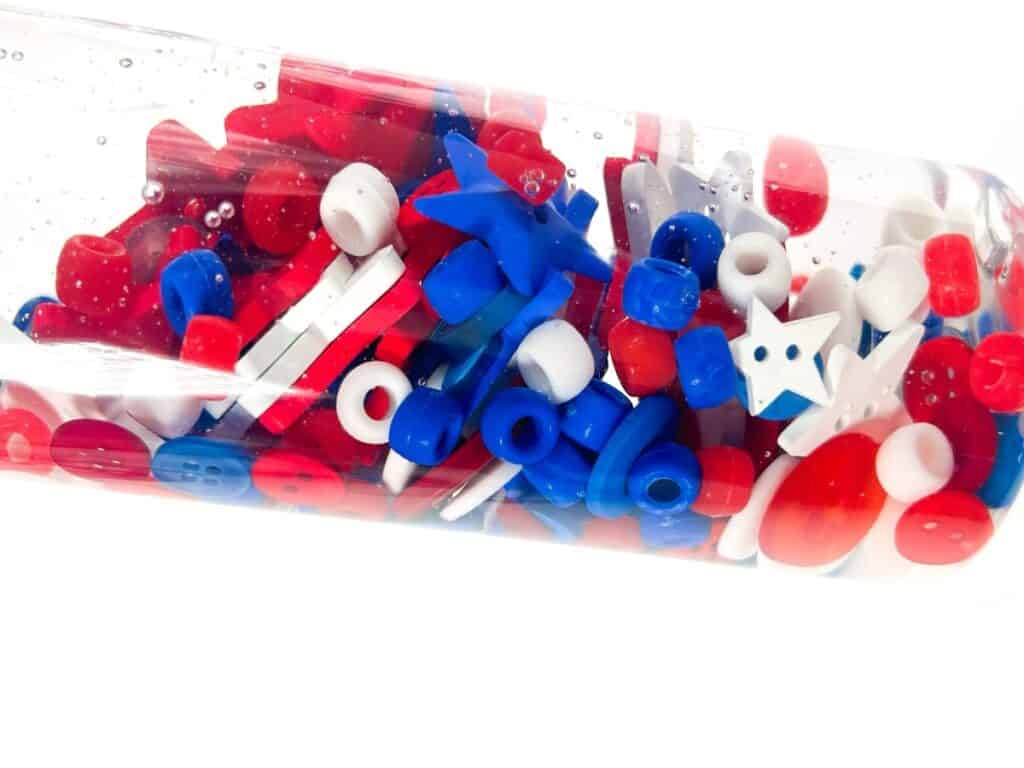
This patriotic sensory bottle is so much fun and can be used for the 4th of July, memorial day, or as a fun discovery bottle for red, white, and blue colors!
The 4th of July is a joyous occasion in the United States, filled with fireworks, parades, and patriotic celebrations. If you’re looking for a fun and engaging activity to commemorate this special day, these 4th of July sensory bottles are the perfect choice!
This article will guide you through the process of creating your own vibrant red, white, and blue sensory bottle, filled with patriotic colors and fascinating elements perfect for sensory play.
So, let’s dive in and learn how to make a memorable sensory experience for your toddler!
Benefits of a 4th of July Sensory Bottle
Engaging in sensory play with Fourth of July sensory bottles offers numerous benefits for both children and adults. Here are some of the incredible benefits of sensory bottles:
- Promotes Creativity: Sensory bottles encourage imagination and creativity. As you customize your sensory bottle with different colors, shapes, and decorative elements, you can explore your artistic side and create a visually stunning masterpiece.
- Encourages Relaxation: Watching the mesmerizing motion of the sensory elements in the bottle can have a calming effect. The gentle movement of the red, white, and blue stars and buttons can help reduce stress and promote relaxation.
- Supports Sensory Exploration: Sensory bottles provide a stimulating sensory experience. By incorporating different textures, colors, and visual effects, toddlers engage multiple senses and promote sensory exploration, enhancing cognitive development and sensory processing skills.
- Portable Entertainment: The 4th of July sensory bottle is not only a fun activity but also a portable form of entertainment. It can be taken on trips, used in the car, or enjoyed during picnics and outdoor gatherings, providing hours of engaging sensory play for children and adults alike.
- Develops Fine Motor Skills: One of the most important things for toddlers to develop are their fine motor muscles, which is why I create so many sensory bins and sensory bottles DIY for them to learn, develop, and use those muscles!

Some of these links are affiliate links meaning if you purchase from these links, I will earn a commission at no extra cost to you. Everything I share is my own opinions and things I personally use and love. You can learn more by reviewing my disclosure. As an Amazon affiliate, I earn from qualifying purchases.
How to Make a 4th of July Sensory Bottle
For one of your 4th of July preschool activities, make this sensory bottle! It is so easy and doesn’t require much.
Here is how to make a Fourth of July sensory bottle:
Materials Needed
- Sensory bottle
- Star buttons
- Red, white and blue beads
- Red, white and blue buttons
- 5 oz. bottle of Elmer’s clear school glue
- Warm water

Instructions
- Fill a measuring cup with about 2 cups of warm water. Pour the glue into the warm water. Stir well with a fork or whisk. I’ve found that doing this helps to keep bubbles from forming in the sensory bottle. Sometimes when you pour the glue straight into the sensory bottle and shake it, it can create a lot of bubbles!

2. Pour the glue and water mixture into the bottle, about half way.
3. Add the contents of the sensory bottle: stars, beads, and buttons.

4. Fill the remainder of the bottle with the water and glue mixture. If bubbles form at the top of the bottle, you can scoop them out with a spoon.
5. Close the bottle well. Secure with strong glue.
6. Mix the bottle around until the contents move around freely!

4th of July Sensory Bottle

This easy 4th of July sensory bottle is one of the fun sensory activities for independence day that your kids will love to do! Use in your home or as a 4th of July theme preschool in school too.
Materials
- Sensory bottle
- Star buttons
- Red, white and blue beads
- Red, white and blue buttons
- 5 oz. bottle of Elmer’s clear school glue
- Warm water
Instructions
- Fill a measuring cup with about 2 cups of warm water. Pour the glue into the warm water. Stir well with a fork or whisk. I’ve found that doing this helps to keep bubbles from forming in the sensory bottle. Sometimes when you pour the glue straight into the sensory bottle and shake it, it can create a lot of bubbles!
- Pour the glue and water mixture into the bottle, about half way.
- Add the contents of the sensory bottle: stars, beads, and buttons.
- Fill the remainder of the bottle with the water and glue mixture. If bubbles form at the top of the bottle, you can scoop them out with a spoon.
- Close the bottle well. Secure with strong glue.
- Mix the bottle around until the contents move around freely!
Patriotic Sensory Bottle Wrap-Up
Creating a 4th of July sensory bottle is a fantastic way to engage in sensory play and celebrate Independence Day.
It offers a multitude of benefits and is one of the top 4th of July kid’s activities, especially for toddlers.
So, gather your supplies, follow the step-by-step instructions, and get ready for a captivating sensory experience that will add an extra touch of sparkle to your 4th of July festivities.
Make a fun 4th of July Sensory Bin too!
Pin This Post For Later:

Check out other fun sensory bottle ideas:
- Calming Sensory Bottle
- Sensory Bottle with Hair Gel
- Unicorn Sensory Bottle
- I Spy Sensory Bottle
- Pom Pom Sensory Bottle
- 4th of July Sensory Bottle
- Butterfly Sensory Bottle
- Magnetic Sensory Bottle
- DIY Rain Stick Shakers
- Summer Sensory Bottle
- Easter Sensory Bottle
- Fall Sensory Bottle
- Winter Find-And-See Sensory Bottle
- Calming Sensory Bottle


